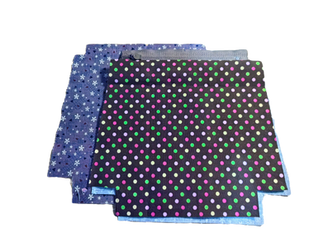
Craft your own stylish and functional boxy zipper purse with this easy-to-follow guide! Whether you're a seasoned sewist or a beginner, this project is perfect for adding a touch of handmade charm to your accessories. Let’s get started!

Download the FREE PATTERN here
Materials Needed:
Outer fabric - Check out these colorful fabric bundles.
Lining fabric
Fusible interfacing (medium weight) - Try Pellon Fusible Interfacing.
Zipper (slightly longer than the width of your purse)
Thread to match your fabric
Fabric scissors or rotary cutter - Fiskars Rotary Cutter.
Self-healing cutting mat - OLFA Self-Healing Mat.
Sewing pins or clips - Clover Wonder Clips.
Measuring tape or ruler - OLFA Quilting Ruler
Sewing machine - Explore the Janome 3160QOV Quilts of Valor Sewing Machine
Iron
Optional: Decorative elements (e.g., applique, embroidery, or trim)
Instructions:
1. Prepare Your Pattern and Materials
Print the pattern on a 100% scale and verify the size using the calibration square (1” x 1”).
Cut out the pattern pieces as indicated. Depending on your preference, use the version with or without seam allowances.
2. Cut Your Fabric and Interfacing
Trace the pattern onto your outer fabric, lining fabric, and interfacing. Add seam allowances if you are using a pattern that doesn’t include them (the seam allowance in my pattern is 3/8").
Cut all pieces carefully along the lines.

Two pieces of outer fabric and lining fabric
3. Apply Interfacing
Fuse the interfacing to the wrong side of the outer fabric using an iron. Follow the manufacturer's instructions for heat and time.

4. Assemble the Zipper Panel
Align the zipper face down along the top edge of one outer fabric piece.
Place the corresponding lining piece on top, aligning the edges with the zipper.
Pin or clip the layers and sew using a zipper foot.
Press the seam and topstitch near the zipper for a neat finish.
Repeat with the other side of the zipper.
Make the zipper tab by cutting a piece of fabric to 2” x 3”. Fold it lengthwise four times, then topstitch to secure.
Fold the tab in half, place it at one end of the zipper with the folded edge inside the bag, and sew it in place.
5. Sew the Main Body
With the zipper partially open, place the outer fabric pieces right sides together. Do the same with the lining pieces.
Pin or clip around the edges, leaving an opening in the lining for turning.
Sew around the perimeter with a 3/8” seam allowance.

6. Create Boxed Corners
Pinch the corners so the side and bottom seams align. Pin and sew across to create boxed corners.
Trim off excess fabric to reduce bulk.
7. Create a Boxed End Zipper
Pinch the end of the zipper the same way you create boxed corners. Be careful when stitching over the zipper teeth.
Trim the excess fabric to reduce bulk.
8. Turn and Finish
Turn the purse right side out through the opening in the lining.
Push out the corners and press.
Sew the lining opening closed using a ladder stitch or topstitch.

8. Final Assembly
Tuck the lining into the outer fabric.
Press the purse for a polished look and test the zipper.
Tips:
Use fabric clips for bulkier sections.
Double-check seam allowances to ensure proper fit.
Add some decorative touches before putting the pieces together!

I like to use fabric scraps to create a patchwork design instead of using a single piece of fabric—it turns out so cute!


Comments